


Making Furniture For My 1:12 Scale Model
- Melissa Wilson

- Feb 17, 2020
- 4 min read
Updated: Feb 28, 2020
To begin making furniture I began looking at online doll house accessory retailers to see what was around, also to see the style and pricing of items. Firstly I looked on Wish.com where I have found a few small pieces such as playing card and a Radio for very cheap. I then began browsing MinimumWorld.com where I found multiple items for a bargain including a TV, Bottles, Telephone and many more. MelodyJane.com I found bit more expensive however it allowed me to get some ideas for what else I could make.
Following my online research, on Tuesday I decided to go to some local charity shops in search for potential things I could use in my model, unfortunately I ended up with nothing being abit of a wasted journey. However, in the final charity shop I was browsing the book section and came across the book Making Dolls' House Interiors by Carol Lodder and Nigel Lodder. This was a great find as it shows flat patterns for furniture and also is made to create items at the same scale as I am using at 1:12.
Following my search during this weekend in a great little book shop in Maidstone called Oxfam. I found three more great books Dolls' House Details by Kath Dalmeny, World War I by Susanne Everett, and The Great War Diaries by Gunnar & Florian Dedio. All of these books are going to fuel my research throughout this project.


To start making furniture, I looked in the first book I bought Making Dolls' House Interiors by Carol Lodder and Nigel Lodder. Using some of the ideas of the flat pattern design, it allowed me to think about how I could create the same thing but in my own way and with the machines I have access to. I knew instantly the laser cutter was going to be best for the job, to design and 3D print the object would take a lot of time, where as on the laser cutter it would take minutes. I measured up a chair and began drawing up on illustrator at scale 1:12. I needed to think about the joining parts of the chair and how well the chair would be structured. Following on from making the rings a few weeks ago with the jigsaw pieces, I thought this would be a good approach. On the back of the chair the back panel, where the seat would connect I cut out notches of the back panel, and added the panels onto the seat panel to create a smooth connection between the two. I also left a notch cut out of the front two corners of the chair to allow me to attach the two front legs.


This is how the chairs look glued together with Gorilla Wood Glue. They haven't been sanded yet, however when I do the joints of the wood will be far less visible. I am really happy with how these have come out, it is a quick, easy and cheap way of making furniture. This was all completed on Monday and Tuesday.

On Wednesday morning, I went straight onto the computer and began looking up dimensions of furniture. I looked around and found that IKEA's website was best for diversity, and having the dimensions of each part of the furniture. Below I was able to create a dinning table, a desk, a shelving unit, 2 x benches and a chest of draws.
IKEA Products...

This is how each piece of furniture has turned out, everything measured up perfectly which I am very proud of. I have sanded down the rough parts of the furniture to hide the seams of the wood. My next step with these is to distress them, make them used/ worn down and possibly rotted due to the damp environment I want to portray. I do need to prime the wood also before anything else.


Thursday morning I began drawing up a single bed and a baby cot. Using IKEA again I was able to take measurements from their website and recreate a flat pack pattern on illustrator.
IKEA Products...
Cot - https://www.ikea.com/gb/en/p/gonatt-cot-light-grey-20385558/

This is how it all looks put together, these still need sanding however I am happy with how they have come out. I also need to create a base for the cot.


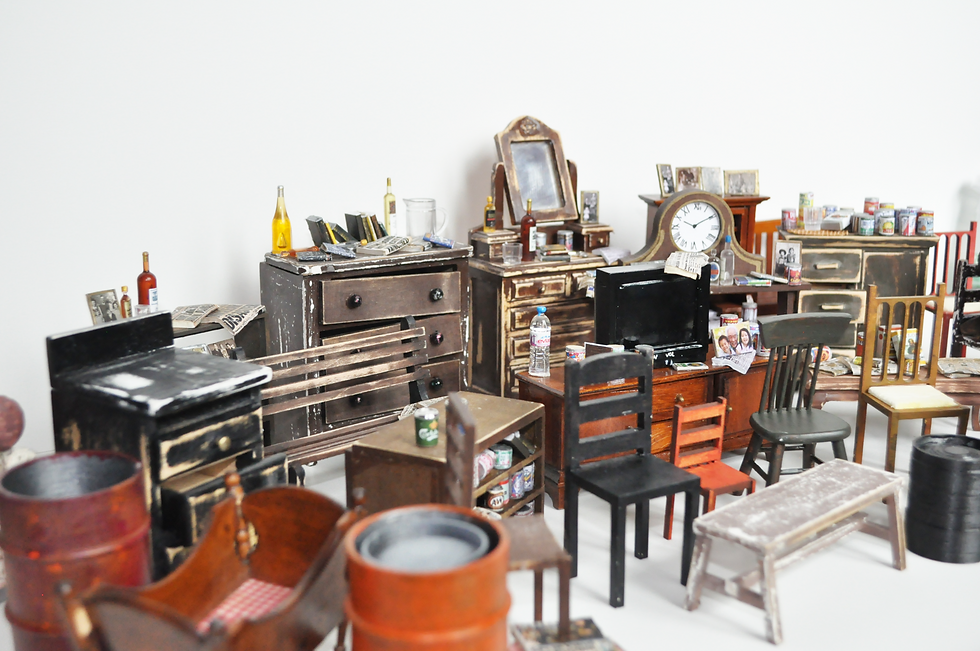
Here is an image of everything I achieved this week, while waiting for materials to arrive. I have allowed myself to save time further down the line when it come to the dressing stage. I need to create some draw hands for my chest of draws as well as attach the draws for the desk.

I have placed some of the furniture I have already made into my prototype model. Even though they are unpainted, I really like how they fit in the space. Areas of the tunnel will be wider and more room like coming off of the tunnel.



Comments